Welcome First Grade PNG Design: A Practical Guide to Quality and Application
Entering first grade is a monumental milestone for any child, marking the transition from early childhood education into formal schooling. For educators, parents, and small business owners alike, capturing this moment with high-quality merchandise or decor is a popular way to celebrate the occasion. This is where the Welcome First Grade PNG Design becomes an essential asset in your creative toolkit. However, simply downloading a graphic file is not enough to ensure professional results. The difference between a cluttered, amateur-looking product and a polished, market-ready item often comes down to understanding technical specifications, resolution standards, and appropriate application methods.
Many creators overlook the importance of digital asset quality until it is too late. You might find a cute design online, but if you do not understand DPI (Dots Per Inch), pixel dimensions, or how different substrates interact with sublimation and vinyl cutting, your final product may suffer from blurriness, color distortion, or poor adhesion. This guide breaks down exactly what is included in a comprehensive 14-product PNG pack and offers practical advice on how to use these files effectively without common pitfalls.
Understanding the Technical Specifications
Before diving into the specific items included in the bundle, it is crucial to grasp why technical details matter. In the world of digital printing and crafting, "PNG" stands for Portable Network Graphics, a format known for supporting transparency. This feature allows you to place the design over any background without a white box surrounding it. However, transparency alone does not guarantee quality. The two most critical metrics are DPI and pixel dimensions.
300 DPI is the industry standard for high-quality printing. If a file is set to 72 DPI—the typical screen resolution—it will appear crisp on a monitor but will look pixelated and blurry when printed on a mug, shirt, or sticker. The designs listed below are all created at 300 DPI, ensuring they meet professional print standards. Furthermore, the physical dimensions provided indicate the actual size the image will occupy on your material. Mismatching these dimensions can lead to stretching, squashing, or excessive whitespace.
What’s Included: Analyzing the 14-Product Bundle
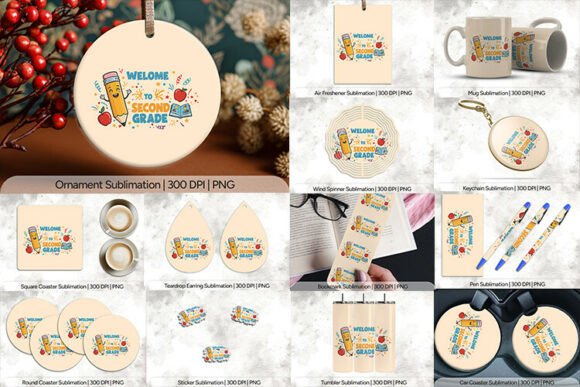
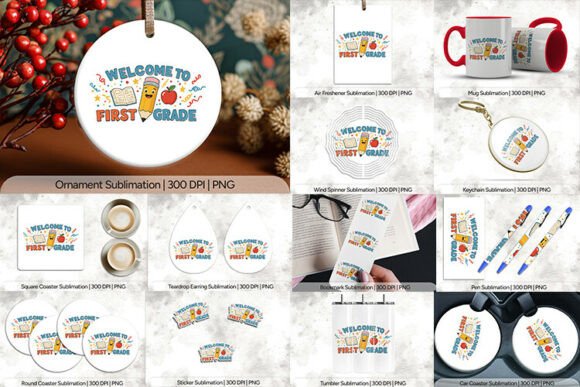
A robust PNG pack should offer versatility across various product categories. Below is a detailed breakdown of the 14 products included in this collection, along with insights on how to utilize each one effectively.
Drinkware and Coasters
Drinkware is perhaps the most popular category for school-themed merch. The inclusion of multiple coaster types and mugs allows for diverse inventory options.
- Mug (9.75×4.75 Inches / 2925×1425 Pixels): This aspect ratio is ideal for standard ceramic mugs. Ensure your design wraps correctly around the curve. Many beginners make the mistake of placing text directly on the edge where the handle attaches, making it difficult to read or apply.
- Car Coaster (2.5×2.5 Inches / 758×768 Pixels): Small and functional. These are great for impulse buys or as add-on items in a cart. Note that the slightly lower pixel count compared to square coasters is due to the specific shape constraints, but 300 DPI remains consistent.
- Round Coaster & Square Coaster (4×4 Inches / 1200×1200 Pixels): Having both shapes provides flexibility for different table settings and aesthetic preferences. The square version is easier to cut with standard plotters, while the round version requires careful die-cutting or precise plotting.
- Tumbler (9.3×8.2 Inches / 2790×2460 Pixels): Tumblers have become a staple in back-to-school season. The vertical orientation of this file is perfect for wrapping around tall travel mugs. Be mindful of the curvature; designs centered perfectly on a flat screen may need slight adjustment when applied to a cylindrical surface to avoid visual distortion.
Accessories and Wearables
Personal accessories allow students and teachers to carry their pride in their new grade everywhere they go.
- Keychain (2.56×2.56 Inches / 768×768 Pixels): A compact item that requires clean lines. Because keychains are small, intricate details in the PNG might get lost. It is advisable to keep the design bold and simple for this medium.
- Bookmark (2×6 Inches / 600×1800 Pixels): The long, narrow format is classic for bookmarks. Ensure there is sufficient margin space so that text isn't covered by the binding of a book or cut off during trimming.
- Pen (2.5×5 Inches / 750×1500 Pixels): Similar to bookmarks, pens require a vertical layout. When designing for pens, consider that the clip area often obscures part of the design. Place critical elements like "First Grade" away from the top third of the image.
- Wind Spinner (2.69×3.69 Inches / 807×1107 Pixels): A unique craft item. The spinning motion means static images can create optical illusions. Test your design by rotating it mentally to ensure it looks balanced in motion.
Jewelry and Decor
For those targeting teachers or older siblings, jewelry and home decor offer higher perceived value.
- Ornament (4×4 Inches / 1200×1200 Pixels): Perfect for holiday sales later in the year. The square format works well for wooden or acrylic blanks. Remember that ornaments are viewed from a distance, so contrast is key.
- Round Earring (1.5×1.5 Inches / 450×450 Pixels): Tiny details vanish here. Use solid colors and thick outlines. Avoid fine textures that may bleed during the printing process on metal blanks.
- Teardrop Earring (1.35×2 Inches / 405×600 Pixels): The teardrop shape adds elegance. Ensure the design flows vertically, guiding the eye from the top point down to the rounded bottom.
Stickers and Functional Items
- Sticker (1×1 Inch / 300×300 Pixels): A single inch is very small. This size is best used for bulk orders or as part of a sheet. Ensure the core message is legible at this scale. If the text is too small, it will be unreadable.
- Air Freshener (300 DPI PNG / 10×10 Inches): Wait, 10x10 inches? This likely refers to the digital canvas size for a large air freshener blank or a printable sheet. Verify the physical size of your specific blank before printing. Large prints require high-resolution files to prevent pixelation, which is why 300 DPI is non-negotiable here.
Common Mistakes to Avoid
Even with high-quality assets, errors in execution can ruin a project. Here are three frequent missteps and how to correct them.
Ignoring Substrate Compatibility
Not all PNGs work equally well on all materials. Sublimation requires polyester-coated items to transfer ink properly. If you attempt to sublimate onto a cotton t-shirt without a coating, the image will wash out completely. Similarly, vinyl cutting requires solid vector-like edges. While PNGs are raster images, they can be used for vinyl if the design is simple. Complex gradients in a PNG will not translate well to vinyl, resulting in a muddy, unrecognizable cut.
Scaling Without Checking Resolution
A common error is taking a small PNG, such as the 1-inch sticker file, and scaling it up to fill a large poster. No matter how much you enlarge it, the pixels remain the same. The result will be blocky and jagged. Always start with the largest available file size for your intended output. If you need a large poster, use the 10x10 inch air freshener file or source a separate high-res vector file, rather than stretching a small sticker graphic.
Neglecting Bleed and Safety Margins
When printing on items like mugs or tumblers, printers often require a "bleed" area—an extension of the design beyond the cut line to account for minor shifting during production. If your PNG has hard edges right at the border, you risk having thin white lines appear on the final product if the alignment is slightly off. Leave some padding around your design, especially for items that wrap around curves.
Best Practices for Implementation
To maximize the utility of your Welcome First Grade PNG Design pack, follow these strategic steps:
- Organize Your Files: Create folders for each product type (e.g., Drinkware, Jewelry). Naming conventions like "FirstGrade_Mug_300DPI.png" help prevent using the wrong file for the wrong job.
- Test Print First: Before committing to a full batch of 50 mugs, print one sample on regular paper to check alignment and color accuracy. Then, test on a scrap piece of your actual substrate. Colors on screens (RGB) differ from print (CMYK or sublimation dyes). Adjust saturation and brightness accordingly.
- Combine Designs Creatively: Don’t just slap the logo on every item. Mix and match elements. Use the earring design as a charm on a keychain, or combine the bookmark text with the ornament background. This creates unique variations without needing new assets.
- Verify Dimensions: Double-check the physical size of your blank against the PNG dimensions. If your tumbler is 9.3 inches tall but your PNG is only 8 inches, you will have awkward empty space. Scale the image proportionally to fit, keeping an eye on DPI to ensure you don’t drop below 300 DPI in the final scaled size.
Conclusion
The Welcome First Grade PNG Design pack is more than just a collection of images; it is a versatile toolkit for celebrating a significant educational milestone. By understanding the technical specifications—such as the 300 DPI standard and precise pixel dimensions—you can avoid costly mistakes and produce high-quality products that resonate with parents, teachers, and students. Whether you are creating classroom decorations, personalized gifts, or commercial merchandise, paying attention to detail in file selection and application ensures your efforts result in professional, satisfying outcomes. Take the time to test, organize, and adapt these designs to your specific needs, and you will find that this bundle offers exceptional value for any creator in the education and crafting space.